> For the complete documentation index, see [llms.txt](https://docs.mindee.com/llms.txt). Markdown versions of documentation pages are available by appending `.md` to page URLs; this page is available as [Markdown](https://docs.mindee.com/v1/workflows/review-interface-1/how-to-integrate-workflows-in-your-system.md).
# How to integrate workflows in your system
## How to integrate workflows in your system
## Overview
This guide will walk you through integrating Mindee workflows into your system. Using the the example of Reviewing data extracted from Invoices, we will showcase how to:
* create a workflow,
* send documents,
* launch the review interface ,
* fetch validated data.
### Prerequisites
Before you start, ensure you have the following:
* A Mindee account. Sign up [here ](https://platform.mindee.com/)if you don’t have one.
* [Your API key](/v1/get-started/create-api-key.md), available from your Mindee dashboard.
{% hint style="warning" %}
Access to Workflows is limited to **Enterprise** customers.
Contact our[ sales team](https://calendly.com/d/crhr-vmm-g23?utm_source=platform\&utm_medium=calendly\&utm_campaign=workflows) to have the workflows activated on your account.
{% endhint %}
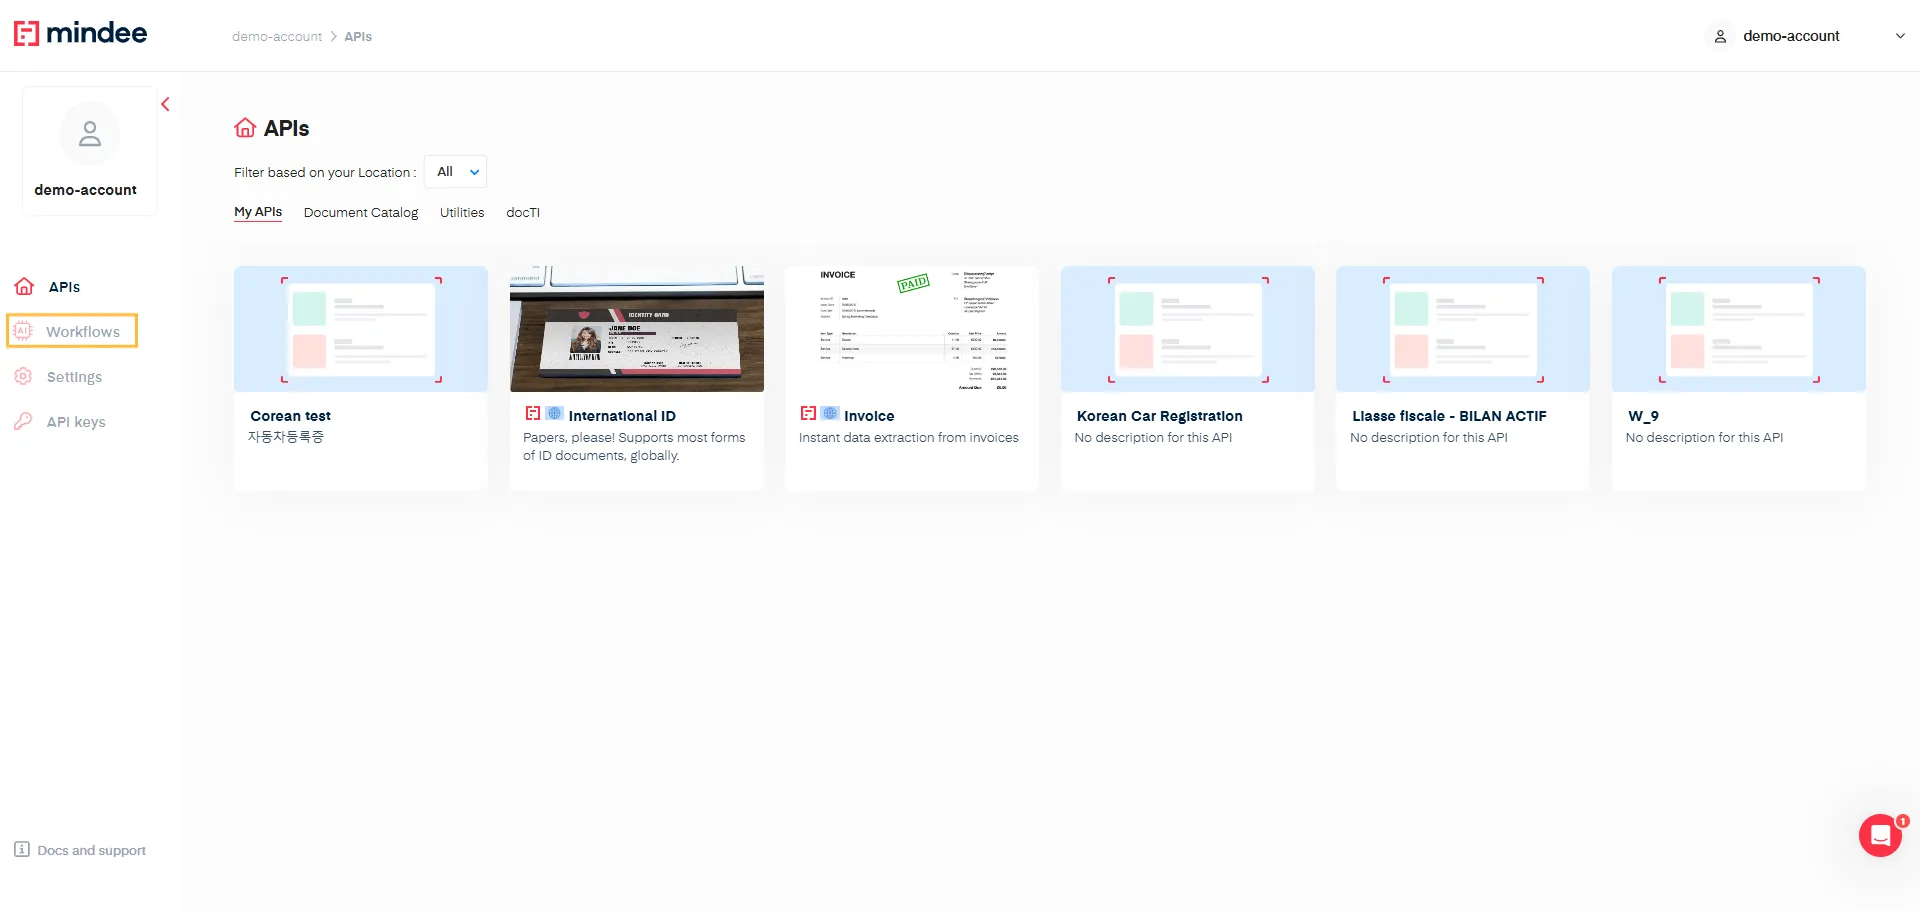
Once activated you will see the Workflows menu item appear on the platform.
### Create the workflow
1. Click on the Workflows menu item to display the Workflow page.
This page displays existing workflows and the creation button.
2. Click on **Create Workflow** to start the creation process.
3. Define the name of your workflow. Four our example, let’s call it ”Invoice Validation”
* We can add a Description (optional). But this can help you later on to better differentiate your workflows. For our example we will enter: “*Validate Invoice key information*”.
4. And finally we check the box:
“By checking this I authorize Mindee to save the documents sent to the workflow and the extracted data for the purpose of the workflow.”
Typically, Mindee doesn't store your documents and data, but this is necessary for workflows since we need to keep the extractions for later validation.
{% hint style="info" %}
Documents and extractions are kept for a period of XXX.
After this period, documents and data (both extracted and reviewed) will be deleted.
{% endhint %}
5. Click *Next* to move to the next step.
Within this step you will define the product you will use for your workflow: in this case the Invoice endpoint, and select the fields we want to validate.
6. Select Invoice. You can type: “*Invoice*” within the **Select** field to find with ease the right extraction product.
The full list of fields from Invoice is now displayed
7. choose to select the following fields:
* Payment date
* Total Tax
* Total Amount
* Taxes
* Invoice Number
* Purchase Order Number
* Supplier Name
* Supplier Company Registrations
* Customer Name
* Customer Company Registrations
* Document Type
* Line Items
Finalize the creation by clicking on the **Create** button.
After creating the workflow you will be redirected directly on the workflow Documents Page.
Once your workflow is created, you can access it through the **Workflows** menu. All created workflows are listed and accessible here.
### Send Documents Using the API
To help you integrate our product using the API, you can check the [Documentation ](/v1/workflows/workflows-ui-tour/documentation.md)page, where you will find the URL of your workflow and sample codes.
**URL**
```
POST https://api.mindee.net/v1/workflows/\/execution
```
* workflow\_id correspond to the id of your workflow you can find it within the URL in the Documentation.
#### Prepare payload
The workflow endpoint can handle different types of payload in order to send your document:
* a binary file
* a base64 encoded file
* a URL
*See* [*Document inputs*](/v1/integration/document-inputs.md) *for more information on supported files.*
#### **Optional form Data**
For workflows you can define some optional data:
* Alias
* Priority
```json
{ alias: , priority: }
```
**Priority**
The priority provides information to your reviewer to understand which files are to be reviewed first.
The following values are available :
* Low
* Medium (default option)
* High
**Alias (optional)**
The Alias is a string (free text) and can be used to filter your list of documents later on. Imagine the Alias as a Tag which could be used to identify a reviewer, a geography, a supplier, …
Select your API key, and copy your sample code among the several proposed:
```curl
curl -X POST \
https://api.mindee.net/v1/workflows//executions \
-H 'Authorization: Token my-api-key-here' \
-H 'content-type: multipart/form-data' \
-F document=@/path/to/your/file.png \
-F priority='low' \
-F alias='sample-code-alias'
```
```python
from mindee import Client, WorkflowResponse
from mindee.parsing.common import ExecutionPriority
# Init a new client
mindee_client = Client(api_key: "my-api-key-here")
workflow_id =
# Load a file from disk
input_doc = mindee_client.source_from_path("/path/to/the/file.ext")
# Send the file to the workflow.
result: WorkflowResponse = mindee_client.execute_workflow(
input_doc,
workflow_id,
# Optionally, add an alias and a priority to the workflow.
# alias="my-alias",
# priority=ExecutionPriority.LOW
)
# Print the ID of the execution to make sure it worked.
print(result.execution.id)
```
```javascript
const mindee = require("mindee");
// for TS or modules:
// import * as mindee from "mindee";
const workflowId: string = ;
// Init a new client
const mindeeClient = new mindee.Client({ apiKey: "my-api-key-here" });
// Load a file from disk
const inputSource = mindeeClient.docFromPath(
"/path/to/the/file.ext"
);
// Parse the file asynchronously.
const asyncApiResponse = mindeeClient.executeWorkflow(
inputSource,
workflowId,
// Optionally: send an alias & priority
// { alias: "my-alias", priority: ExecutionPriority.low }
);
// Handle the response Promise
asyncApiResponse.then((resp) => {
// print the execution id to make sure the request worked
console.log(resp.execution.id);
});
```
```csharp
using Mindee;
using Mindee.Input;
string apiKey = "my-api-key-here";
string filePath = "/path/to/the/file.ext";
string workflowId = ;
// Construct a new client
MindeeClient mindeeClient = new MindeeClient(apiKey);
// Load an input source as a path string
// Other input types can be used, as mentioned in the docs
var inputSource = new LocalInputSource(filePath);
// Send the document to a workflow execution
var response = await mindeeClient.ExecuteWorkflowAsync(workflowId, inputSource);
// Alternatively, give it an alias:
// var response = await mindeeClient.ExecuteWorkflowAsync(workflowId, inputSource, new WorkflowOptions(alias: "my-alias"));
// Print the execution ID to make sure it worked.
System.Console.WriteLine(response.Execution.Id);
// Print the inference result.
// System.Console.WriteLine(response.Execution.Inference);
```
```ruby
require 'mindee'
workflow_id =
# Init a new client
mindee_client = Mindee::Client.new(api_key: 'my-api-key-here')
# Load a file from disk
input_source = mindee_client.source_from_path('/path/to/the/file.ext')
# Send the file to the workflow
result = mindee_client.execute_workflow(
input_source,
workflow_id
)
# Alternatively, set an alias & a priority for the execution.
# result = mindee_client.execute_workflow(
# input_source,
# workflow_id,
# document_alias: "my-alias",
# priority: Mindee::Parsing::Common::ExecutionPriority::LOW
# )
# Print the execution's ID to make sure it worked
puts result.execution.id
# Print the inference, if present
# puts result.document.inference
```
```java
import com.mindee.MindeeClient;
import com.mindee.input.LocalInputSource;
import com.mindee.parsing.common.WorkflowResponse;
import com.mindee.product.generated.GeneratedV1;
import com.mindee.http.MindeeHttpException;
import java.io.IOException;
public class SimpleMindeeClient {
public static void main(String[] args) throws IOException {
String apiKey = "my-api-key-here";
String workflowId = ;
String filePath = "/path/to/the/file.ext";
// Init a new client
MindeeClient mindeeClient = new MindeeClient(apiKey);
// Load a file from disk
LocalInputSource inputSource = new LocalInputSource(filePath);
// Send the file to a workflow
WorkflowResponse response = mindeeClient.executeWorkflow(
workflowId,
inputSource
);
// Alternatively: give an alias to the document
// WorkflowResponse response = mindeeClient.executeWorkflow(
// workflowId,
// inputSource,
// WorkflowOptions.builder().alias("my-alias").build()
// );
// Print the workflow ID.
System.out.println(response.getExecution().getId());
// Print the inference result.
// System.out.println(response.getExecution().getInference());
}
}
```
```php
;
// Init a new client
$mindeeClient = new Client("my-api-key-here");
// Load a file from disk
$inputSource = $mindeeClient->sourceFromPath("/path/to/the/file.ext");
// Send the file to the workflow
$workflowResponse = $mindeeClient->executeWorkflow($inputSource, $workflowId);
// Alternatively, add an alias and priority to the document:
// $options = new WorkflowOptions('document-alias', "document-priority");
// $workflowResponse = $mindeeClient->executeWorkflow($inputSource, $workflowId, $options);
echo $workflowResponse->execution;
```
Do not forget to replace the `` with your own workflow id.
If you go back to your workflow on the platform, Documents section, you will see your uploaded documents listed.
### Retrieve Status and Reviewed Data Using a Webhook
{% hint style="info" %}
Testing webhooks without setting up a web server
For testing, you can use free services like that allow you to get a webhook URL without setting up a web server
{% endhint %}
To test your webhooks, follow these steps:
1. Click on the Webhooks item from your workflow menu. This interface allows you to create, edit, or delete your webhook configurations.
2. Click on the Create a new webhook button.
3. Fill in the URL for your webhook.
After setting up your webhook, you can retrieve the JSON response from your POST requests.
#### JSON Response
Here is an example JSON Response from the workflows execution endpoint, in case your document passes all the validation checks performed by Mindee API.
```json
{
"api_request": {
"error": {},
"resources": [
"execution"
],
"status": "success",
"status_code": 202,
"url": "https://api.mindee.net/v1/workflows//executions"
},
"execution": {
"batch_name": null,
"created_at": null,
"file": {
"alias": "sample-code-alias",
"name": "sample_invoice.jpeg"
},
"id": "04dc20b1-9339-433c-9738-47e88f72adab",
"inference": null,
"priority": "low",
"public_url": ,
"reviewed_at": null,
"reviewed_prediction": null,
"status": "processing",
"type": "manual",
"uploaded_at": "2024-11-27T09:48:33.337303+00:00",
"workflow_id":
}
}
```
In the JSON response you will have directly access to the `< public_url >` that you can call to access the Review interface on your own system.
{% hint style="info" %}
Note that each file will have a unique public URL.
{% endhint %}
You receive as well the `status` of the document. This status can be used to set up specific actions.
Once the status change to `processed` the prediction becomes available and can load the review interface using an iframe to review the extraction and the public URL.
## Loading the Validation Interface in an iFrame
### Load the iFrame
Once you have your public URL, you can load it in an iFrame to embed the validation interface in your software.
To load the iFrame, you only have to set the src tag attribute of your iFrame with the `public_url` value. Here is an example in React.js:
```typescript
```
### Customize the iFrame
Parameters can be set in the `public_url` as query parameter in order to customize the iframe.
```
https://platform.mindee.com/review-interface/?lang=fr&primary_color=%23FF0000&display_quit=false
```
* `lang` (default `en`): Language of field labels. Possible values are `fr` and `en`
* `primary_color`: Hexadecimal color code of the button (the %23 is the '#' code for URL encoded symbols)
* `display_quit` (default `false`): Whether to display the "quit' buttons or not. Possible values are `true` and `false`
### Fetch the Data
When a user hits the **validate** or reject **button**, a callback is triggered on the iframe, allowing you to fetch the data dynamically in your frontend code.
Here is a React.js example using `useEffect` to catch the data validated by the user in the iFrame:
```javascript
useEffect(() => {
const handleMessage = (event: MessageEvent) => {
if (event.origin !== 'https://platform.mindee.com') return
// Do whatever you need with the validated data here
console.log(event.data)
}
window.addEventListener('message', handleMessage)
return () => window.removeEventListener('message', handleMessage)
}, [])
```
When the user validate or reject the document, the webhook is also called with the reviewed data, allowing you to fetch it backend side.
---
# Agent Instructions
This documentation is published with GitBook. GitBook is the documentation platform designed so that both humans and AI agents can read, navigate, and reason over technical content effectively. Learn more at gitbook.com.
## Querying This Documentation
If you need additional information that is not directly available in this page, you can query the documentation by asking a question.
Perform an HTTP GET request on the following URL with the `ask` and `goal` query parameters:
```
GET https://docs.mindee.com/v1/workflows/review-interface-1/how-to-integrate-workflows-in-your-system.md?ask=&goal=
```
`ask` is the immediate question: it should be specific, self-contained, and written in natural language.
`goal` is what the user is ultimately trying to achieve, the reason they need the answer. Sharing it helps GitBook give you a better, more relevant answer. A goal is most helpful when it describes the outcome the user wants rather than restating the question. For example, with `ask=how do I create an API token`, a goal like `automate deployments from our CI pipeline` lets GitBook tailor the answer to that use case.
The response will contain a direct answer to the question and relevant excerpts and sources from the documentation.
Use this mechanism when the answer is not explicitly present in the current page, you need clarification or additional context, or you want to retrieve related documentation sections.